Edge Node Manager
Within the ARTIK ecosystem, IoTivity is used for the device management functionality of Edge Node Manager. The IoTivity Programmer's Guide gives some insight to the functionality provided.

IoTivity and the Edge Node Manager together with the ARTIK border router service follow the Open Connectivity Foundation (OCF) rules for implementing and accessing devices. OCF uses the naming conventions from the older Open Interconnect Consortium (OIC) specification, so device parameters often start with oic.
Prerequisites
Download the latest software
Download the ota-enm package for your gateway architecture, then unzip it and copy the files to your ARTIK root.
You should find:
-
enm-dashboard
-
Two tar.xz files, which you will use in the ARTIK 030 OTA Firmware Update procedure.
Upgrade the onboarding package
Your gateway must use os_18.05.00 (rev 3.3.0) or later. Check with:
cat /etc/artik_release
Even if you are at this revision, the repository may contain upgraded packages. Bring your board up-to-date.
apt update
apt upgrade
On-board the gateway
On-boarding the gateway module is pre-requisite to installing the Edge Node Manager packages. Go first to the Linux modules "Connect to the World" article to on-board your gateway.
Verify that the lwm2m-client service is running with the command:
systemctl status lwm2m-client
Installing Edge Node Manager
On ARTIK Linux gateway modules running Ubuntu, you'll just do some updates and install packages.
-
Remove the ZigBee daemon. You won't be using it with Thread.
apt remove zigbeed -
Replace the NCP ZigBee firmware with Thread firmware.
Update Network Co-Processor Firmware
The ZigBee/Thread radio on the ARTIK module works with the main processor on the module in what is called network co-processor (NCP) operation. The radio takes on its identity, as either a ZigBee device or a Thread device, depending on the firmware that has been flashed to it.
The factory default firmware gives the module a ZigBee identity. For Thread operation or to use a newer revision of ZigBee, different firmware must be flash-uploaded.
New network co-processor firmware must first be copied to the ARTIK processor module file system, and from there flashed to the radio chip on the module.
- ARTIK 520, 710, and 1020 modules use the EM3587 radio chip as NCP
- ARTIK 530 modules use the EFR32 radio chip as NCP.
Before you begin: You need to stop any currently running process that might be using the serial port linking the NCP to the main processor.
-
Type
systemctl stop artik-ip-driverto stop the Thread daemon -
Type
systemctl stop zigbee-daemonto stop the ZigBee daemon.
Otherwise, the update will fail with an error message.
Load the NCP firmware
The uploading procedure is short, but the file names are long! Review the instructions and table carefully before you start so that you copy only the needed files.
-
To your development PC, download the latest ncp_firmware_20yy_mm_dd.zip package and extract the files for your module.
flash_firmware
ARTIKxxxNCP.zipcontainingxxx.ebl(all options for modulexxx) -
Determine the correct
.eblfile to use for your intended ZigBee or Thread stack. - On your ARTIK board, at the root directory:
- Copy over the correct
xxx.eblfile. - Copy over the
flash_firmwarefile. - Run
chmod 777 flash_firmware
to make the file executable.
- Copy over the correct
- Run the following command to use the internal serial port to transfer the file to the EM3587 or EFR32 radio IC.
./flash_firmware -p /dev/ttyxxxx -f ncp-xxx.ebl
wherettyxxxxis shown in the table below andncp-xxx.eblis the file you copied above.
ARTIK
TypeSerial port Flow control key words in .ebl file name 520 <pre>ttySAC1</pre> rts-cts
(hardware)rts-cts-use-with-serial-uart-btl-xxx
or
HW_FC-use-with-serial-btl-xxx530 <pre>ttyAMA1</pre> rts-cts
(hardware)rts-cts-use-with-serial-btl-xxx 710 <pre>ttySAC0</pre> xon-xoff
(software)xon-xoff-use-with-serial-uart-btl-xxx 1020 <pre>ttySAC0</pre> rts-cts
(hardware)rts-cts-use-with-serial-uart-btl-xxx The ZigBee or Thread NCP firmware is now flashed into the radio and will be retained until replaced.
Troubleshooting
If you see
-
'port open' error: There may be an NCP driver running. Try stopping:
the ip-driver process
systemctl stop artik-ip-driver
or the ZigBee daemon
systemctl stop zigbee-daemon -
'open fail' error on ARTIK 520 or 1020:
open fail : /sys/devices/virtual/sec/artik_zb_power/recovery
then try adding-d artik520or-d artik1020to the command line.
-
Install the Edge Node Manager from the repositories.
apt install enmd
-
Restart the board to allow the new services to be activated during boot.
reboot
The installation automatically installs theartik-borderrouterservice. Wait for [ Booting Done ] before proceeding. -
Check to make sure all needed services are running.
systemctl status artik-ip-driver(the Thread daemon to the NCP)
systemctl status artik-borderrouter(the border router)
systemctl status enmd(the edge node manager)
Installing ENM Dashboard
Install the ENM Dashboard package that you downloaded earlier.
dpkg -i enm-dash...(use Tab to autocomplete)
Installation and use of the dashboard are optional, but it is a convenient tool during your product development phase.
Using Edge Node Manager and Dashboard
Prepare to access your ARTIK gateway from a PC on the same Wi-Fi network.
-
Determine the IP address of your ARTIK board in the usual manner,
ifconfig wlan0
and use it in place of ip_address below. -
Open an up-to-date FireFox browser on your PC. You can use another browser, but FireFox is convenient as it automatically reformats the raw JSON data. (You could instead use a site like www.freeformatter.com/json-formatter.html to do so.)
-
Proceed to the URLs listed below. These are https sites. You will get a security warning.
It is safe to accept the security exception in your browser.
The default login parameters are:
– Username:admin
– Password:adminThese can be changed in the following file.
/usr/local/enm-dashboard/public/assets/js/libENM.js
Web REST API. Start by accessing the Edge Node Manager directly.
-
Launch the discovery process.
https://ip_address/v1.0/service
-
List the discovered nodes.
https://ip_address/v1.0/devices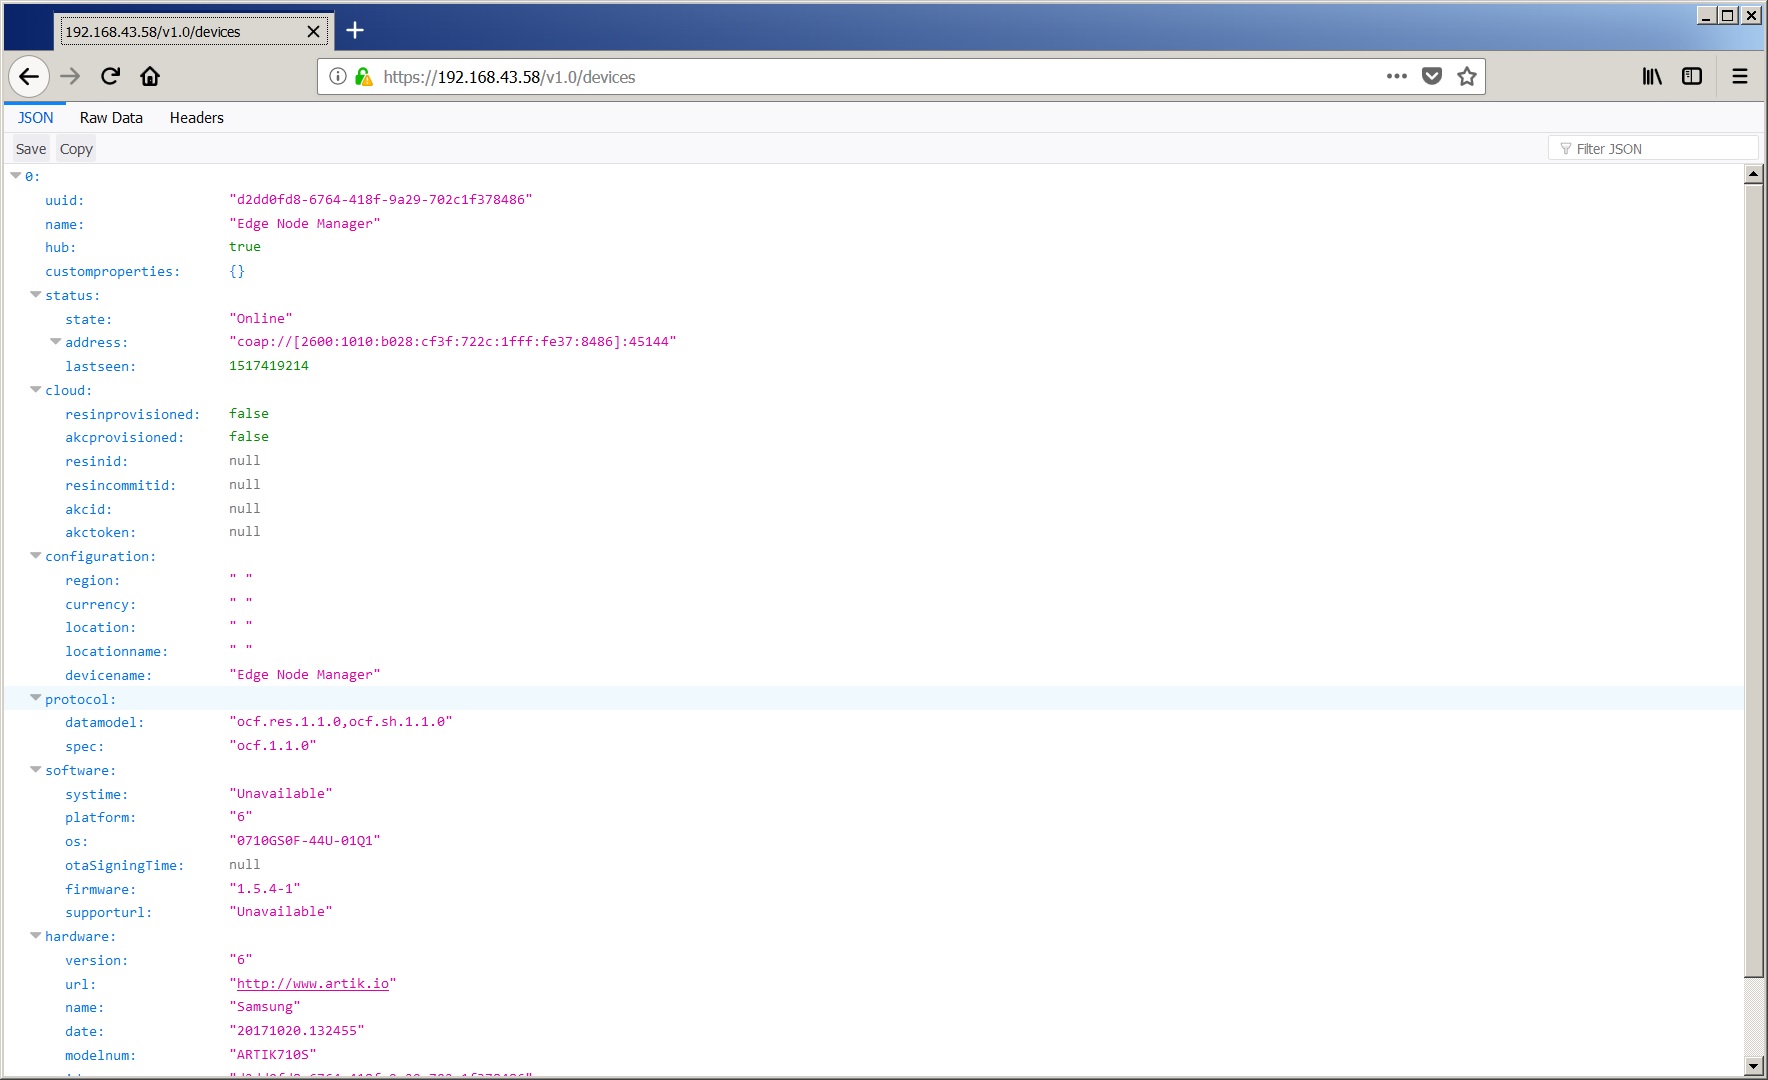
You can use Web REST API protocols to send more specific commands – for example, to register with ARTIK Cloud.
curl -k --digest -uadmin:admin -X POST -H "Content-type: application/json" "https://192.168.1.141/v1.0/service/AKCProvision" -d '{"uuid":"d2dd0fd8-6764-418f-9a29-702c1f1f31c3", "name" : "test030"}'"
The ENM REST API page provides all the details.
Dashboard. Now try an easier way, using the ENM Dashboard at port 1337. Just open the ENM Dashboard page, and explore the capabilities on your own.
https://ip_address:1337/

Setting up the ARTIK 030 Edge Nodes
You will need to Flash-program Thread edge node devices and commission them before you can see them in Edge Node Manager. Refer to the Connect to the World article for details.
Referring to the Dashboard image above:
-
A line entry for ARTIK 030 will appear whenever the device is commissioned.
-
The cloud icon is shown once that device has been on-boarded to ARTIK Cloud.