Publishing to ARTIK Cloud
Until now, we have been using the Samsung ARTIK module solution as an MQTT broker – handling the messages published by others. But what if we also want to act as an MQTT client? That is, the ARTIK module:
- Subscribes to messages from edge devices as local MQTT broker
- Assembles data sets based on the information we plan to save for analysis
- Publishes the assembled data set messages to a cloud-based MQTT broker.
A very practical application of this scheme is for communicating with Samsung ARTIK Cloud. A data exchange platform for IoT developers. ARTIK Cloud can communicate using both Web and MQTT protocols. When acting as an MQTT broker, it keeps the communication bandwidth needs of the client to a bare minimum.
Our scheme is ideal: Rather than have each edge device send its data directly to ARTIK Cloud by way of a local Wi-Fi® gateway/router, the ARTIK module will coordinate the data and place it within a concise and meaningful context before uploading to ARTIK Cloud. Moreover, the ARTIK module will be the only device handling Actions sent from ARTIK Cloud. No edge devices can be hacked or commanded to carry out nefarious activities.
Here we present a scenario that would make use of this operating model, and then describe the ways the ARTIK module could interact with ARTIK Cloud to provide a solution.
Demonstration Scenario
The ARTIK module is being utilized in a power company's home cooling efficiency project. It is currently brokering messages from and to various edge devices. Now the power company wants to archive significant events to ARTIK Cloud for analysis and possible action.

Inputs to the ARTIK module:
- Wall thermostat (actual temperature and desired setting)
- Outside air temperature thermometer
- Attic air temperature thermometer
- Thermometers for refrigerator and freezer interior temperatures
- Door switches on refrigerator for monitoring frequency of access
- Position switch to report whether window blinds are currently open.
The ARTIK module controls:
- Refrigerator pre-cooling (extra cooling in advance of peak electricity demand)
- Air conditioning (also for pre-cooling, if permitted by user)
- Motors to open/close window blinds
- Economizer duct on ventilation system, to bring in outside air to cool with
- Water valve to mist sprayers on roof, using evaporative cooling with the homeowner's filtered gray water to reduce attic temperatures.
Information from the various inputs, along with control states the system selects, all figure into the data that will be uploaded to ARTIK Cloud for the power company to monitor.
While it would be possible for each of the input edge devices to send their data directly to the power company for processing, there are some clear disadvantages to that approach.
- The input data would not be in the context of the control output data being generated by the ARTIK module. That is, it might not be clear how a control action taken by ARTIK was related to receipt of input data from specific edge devices.
- The data handling might not be secure – only the ARTIK module has the TEE security element built-in (unless the edge devices also use ARTIK or other TEE devices).
- Each individually Internet-connected edge device could be hacked – whereas if they connect only to the ARTIK module, ARTIK could completely block outside direct access.
- The power company could be swamped with unimportant data from individual edge devices. It could also miss important spike information during burst periods.
- A temporary interruption in data services might result in lost data from edge devices, whereas the ARTIK subsystem could buffer the data until a connection was re-established.
For these reasons and others, it makes more sense for the ARTIK module to send a combined, secure message to ARTIK Cloud, with all input and control states recorded in a planned format. Moreover, if changes are needed to the way the data is collected or used by ARTIK, the company can remotely send the new algorithms to the ARTIK module alone for implementation.
Prerequisites
You will be using Node-RED setups from previous tutorials. Starting from there, it should take less than 45 minutes to complete the exercise. It may also be helpful to open and log into the following pages in your browser.
| Site | Looks Like This | Used for |
|---|---|---|
| My ARTIK Cloud | 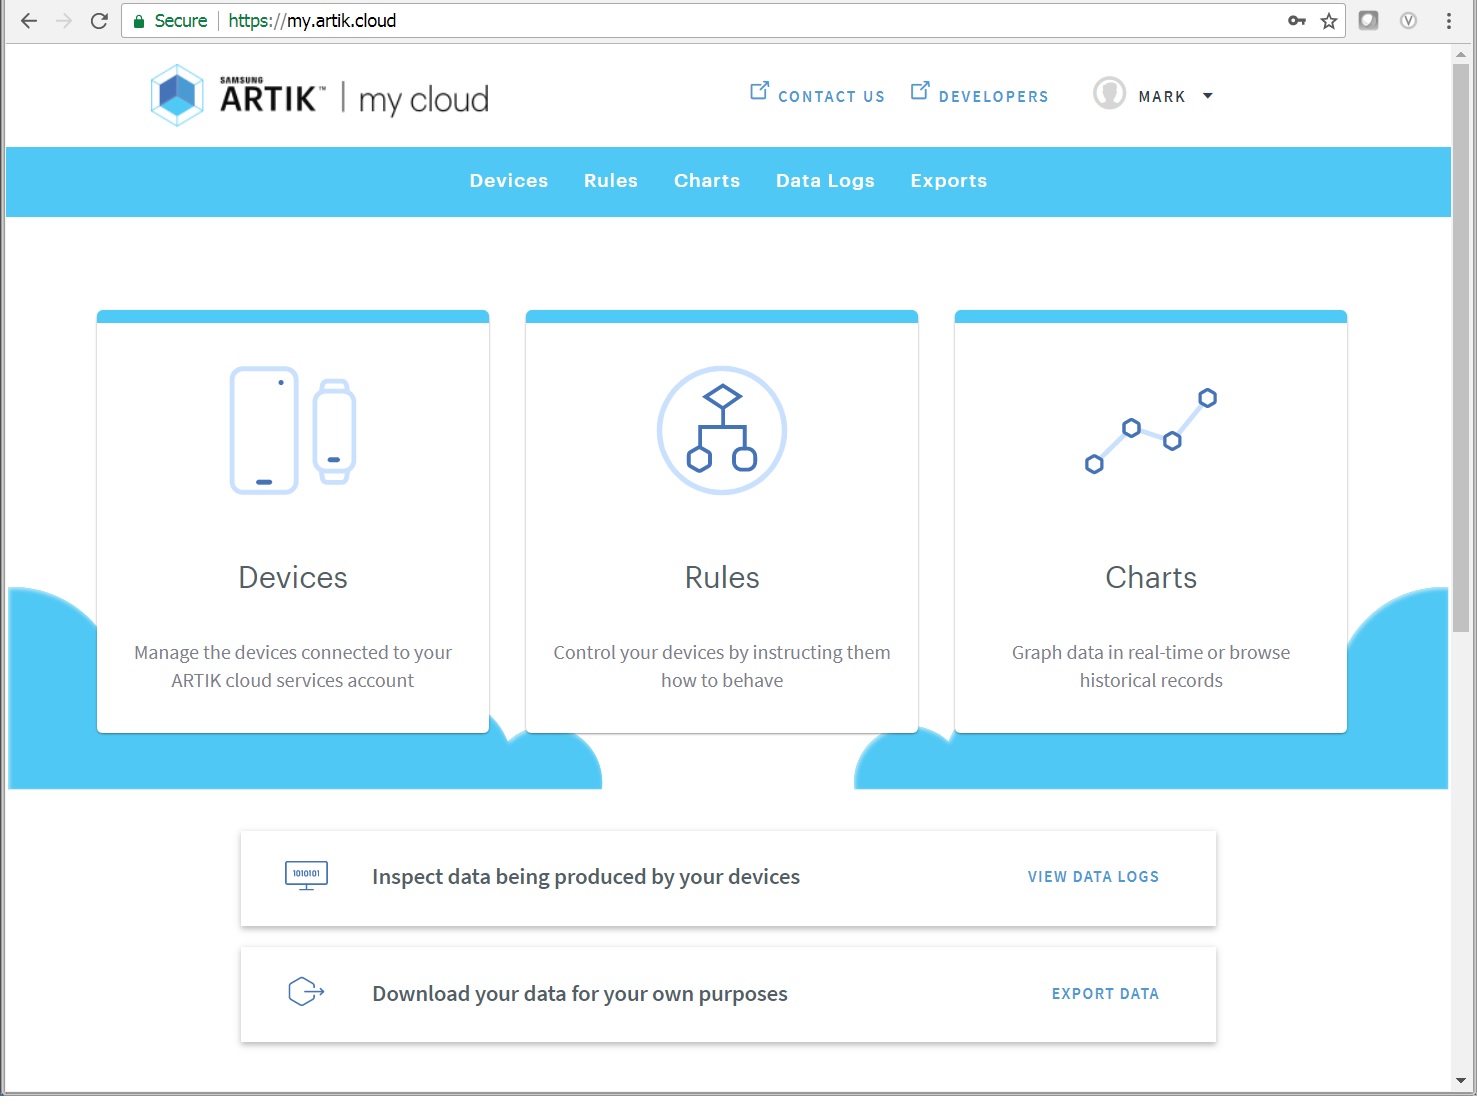 |
Connecting a device; obtaining access tokens; viewing data sent by the device |
| Developer Dashboard | 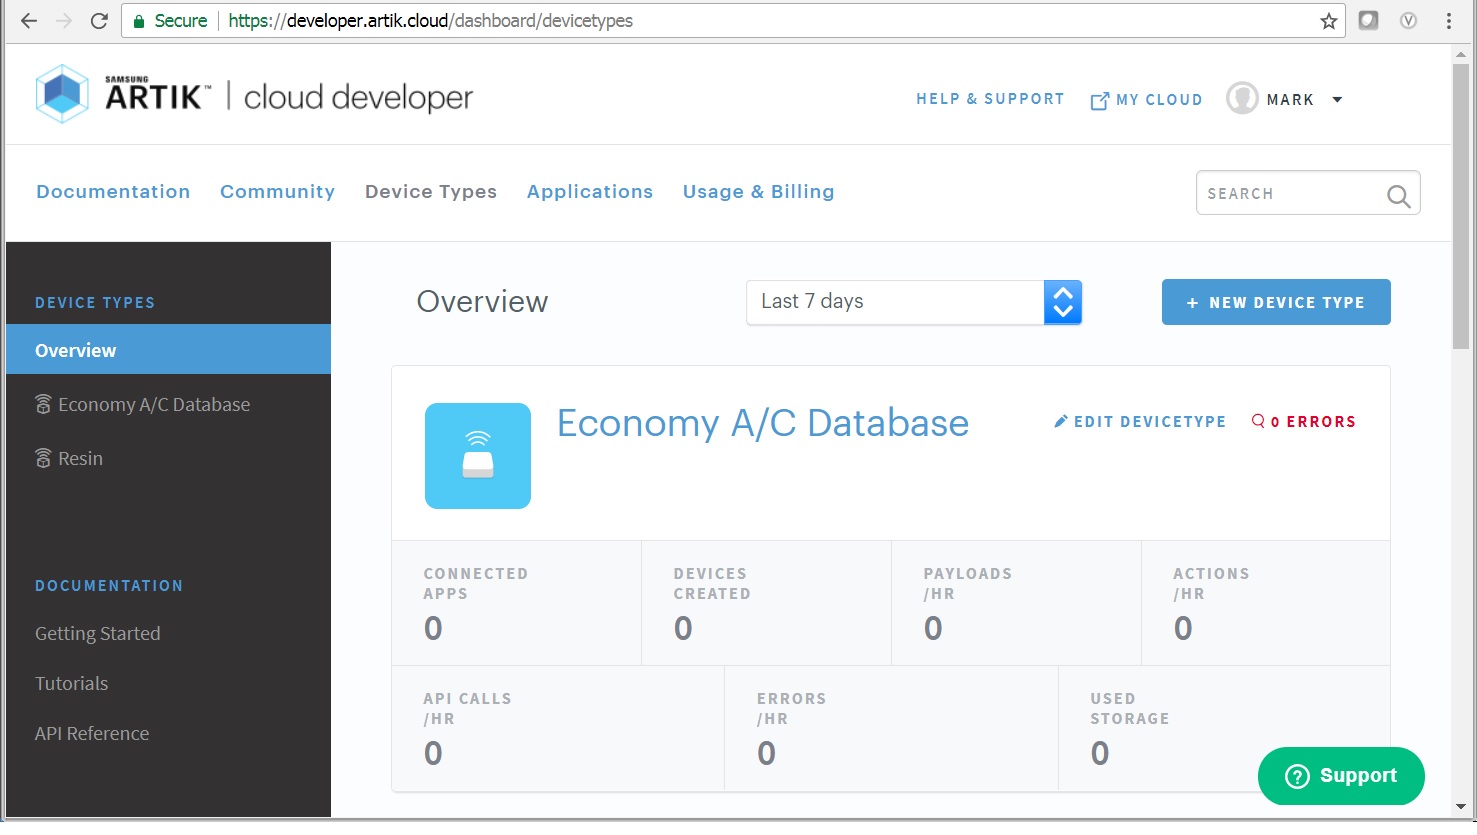 |
Creating a new device and specifying its data format |
Setting Up ARTIK Cloud Manifests
Our data of potential interest is shown below. ARTIK Cloud doesn't need this table organization; it's just for us to use for discussion.
To keep the explanation simple, let's assume that inputs correspond one-to-one with output actions. For instance, when the attic temperature sensor reaches a certain value, the ARTIK module turns on the water valve to the mist sprayer on the roof. (In a real application, the interactions would be more complex.)
| Temp Inputs | ID | & | Switch Inputs | ID | = | Control Outputs | ID |
|---|---|---|---|---|---|---|---|
| Inside actual | insTemp | + | Blinds open | blndOpen | > | Window blind motor | openBlndCtl |
| Inside desired | desTemp | > | Controlled indoor temp | insTempCtl | |||
| Outdoor | outTemp | > | Economizer | openEconCtl | |||
| Attic | atcTemp | > | Roof mister water valve | openMistCtl | |||
| Refrigerator | refTemp | + | Ref door open | refOpen | > | Refrigerator pre-cool | preclRefTempCtl |
| Freezer | frzTemp | + | Frzr door open | frzOpen | > | Freezer pre-cool | preclFrzTempCtl |
We are going to put these sensor and control parameters into fields for ARTIK Cloud to track.
We can send messages to ARTIK Cloud using Web protocols and MQTT exchanges. It's important to understand both of them.
Decide on Data of Interest
Our controller idea is pretty basic – we issue a message containing relevant parameters each time that:
- A temperature changes (for instance, by more than 1/2 degree)
- Any switch state changes
- The ARTIK module changes the state of any control output.
So, for example, those of us accustomed to the Fahrenheit scale for temperatures might expect to see message payloads like these on a warm day.
- Inside temperature 76.4F, user left window blinds open; ARTIK closed them.
"insTemp":76.4,"blndOpen":true,"openBlndCtl":false - User changed thermostat to 72F; ARTIK set A/C to 74 for now (slower cool-down for efficiency).
"desTemp":72,"insTempCtl":74 - Outdoor temperature went up to 98F; ARTIK closed the outside air intake.
"outTemp":98,"openEconCtl":false - Attic temperature reached 137F; ARTIK opened the water valve to the roof mist sprayer.
"atcTemp":137,"openMistCtl":true - Refrigerator temperature 39.3F, door is closed; ARTIK asked it to pre-cool down to 37.1.
"refTemp":39.3,"refOpen":false,"preclRefTempCtl":37.1 - Freezer temperature -1.5F, door is closed; ARTIK asked it to pre-cool down to -3.7.
"frzTemp":-1.5,"frzOpen":false,"preclFrzTempCtl":-3.7
Just to clarify: For the blinds, water valve, door switches, and economizer air intake, we use trueto mean 'physically open' and false to mean 'physically closed' – that is, it is the position of the object, not necessarily an electrically open or closed circuit.
With this as our starting point, let's establish the ARTIK Cloud data format first, and then we can start publishing these messages.
One minor note: As much as we may like the Fahrenheit scale, we need all database data to be normalized to a single system. So we'll actually be storing our data using the Celsius scale. We can always convert back to Fahrenheit for display when needed.
Set Up Manifest
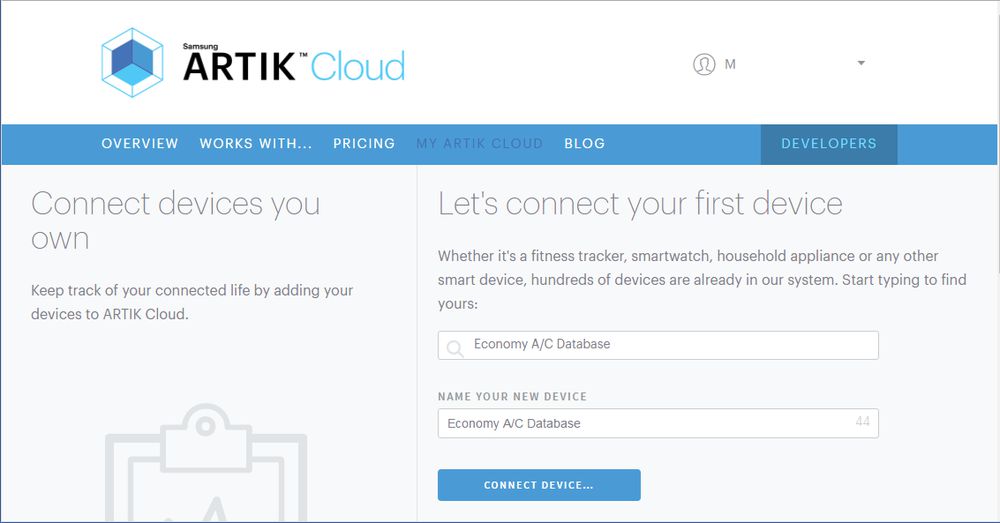
ARTIK Cloud refers to the file containing the data template information as the Manifest (also as the Scenario Template). It's just a .JSON-format file. Setting it up is surprisingly easy.
-
Go to the ARTIK Cloud Developer Dashboard, log in, and click through steps a–d below.
Your Device Types » 
a. ^ if no devices a. ^ after 1st device + New Device Type b. ^ At this point you'll need a title and template file identifier. We called ours "Economy A/C Database" with a unique file ID of "samsung.ssi.mqtt.client.demonstration".
Create Device Type c. ^ + New Manifest d. ^ You're now at the point where you can enter a Simple Manifest, which is all most developers will ever need.
- Click
New Fieldand enter the above fields of interest one-by-one, like this.- Temperatures: Start to type
tempand click onTEMPERATUREwhen it appears. Replace with insTemp, desTemp, etc. as in the table, noting theTinTemp. - Controls: Type in the field name, then click
DATA TYPEand selectBoolean. - In all cases: Put in a clear description such as "Outdoor temperature".
Just do a couple of entries for now, and save your work so far:
a) Click
Next: Device Actionsbut do not enter any actions.b) Click
Next: Activate Manifest.c) Check off the confirmation box indicating that you do not want any actions.
d) Click
Activate Manifest.e) Click the list item that looks like this to get back to where you left off.

Continue making entries. You have a choice here: either continue using the tool by clicking
NEW VERSION, or download and edit the .json file.
- Temperatures: Start to type
- Finish up and save your work version; if you are editing the .json file directly, upload it as a new version.
-
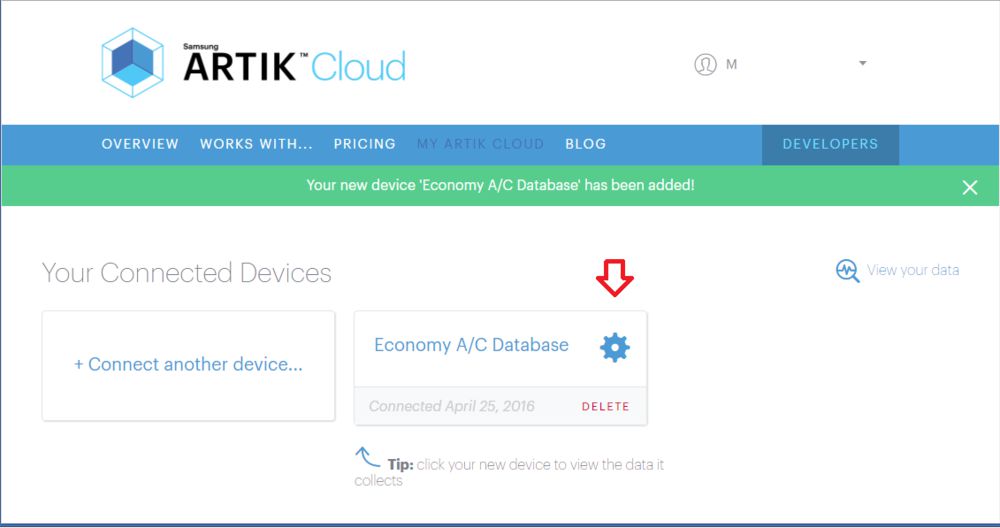
Switch your browser tab back to My ARTIK Cloud, log in if needed, and connect your new device.
-
Click on the device to select the connected device. You should see the data categories you entered, although they don't contain any data (yet).
- Take a moment to appreciate how easy it was to set up a new project to store its data on ARTIK Cloud. That's all there was to it!
Getting Token from ARTIK Cloud
In the previous section, you decided on data of interest. You might like to jump right into sending now, but first things first. Every ARTIK Cloud API call requires an access token. The Device Token is one of three types of access tokens. For the sake of simplicity, we use the Device Token in this tutorial.
It's easy for any valid user to obtain the Device ID and Device Token needed to exchange information with ARTIK Cloud.
- Go to My ARTIK Cloud, and log in if you have not already.
- Click on your device of interest.
- Leave the Device Info page open. You'll be copying and pasting these codes:
- Device ID – you'll use this in the
sdidfield in the steps below. - Device Token – you'll use this in the
accessTokenfield in the steps below.

- Device ID – you'll use this in the
Sending Device Data to ARTIK Cloud
You've finally made it through all the preparation. Now comes the easy part – getting the messages to ARTIK Cloud. We just need to set up Node-RED, and pick some data to send. Then we'll show you two ways to send the data.
Prepare Node-RED
Start Node-RED through your terminal emulator. Do not start Mosquitto – we won't need a local MQTT broker for this tutorial.
-
Set up a new flow as shown, with Inject, Function, and Debug nodes, and a new one – HTTP Request – that we have not used so far in these tutorials. You'll be triggering requests by clicking on the button to the left of the Inject node.

-
For the HTTP Request node, make its method POST, and set its URL as:
https://api.artik.cloud/v1.1/messages -
Copy the headers below, and paste them into the Function node, replacing the Device Token line with the
accessTokenyou retrieved above.1 2 3 4 5
msg.headers = { "Content-Type": "application/json", "Authorization": "Bearer _your_DEVICE_TOKEN_goes_here_" } return msg; -
Click Deploy, then trigger the Inject node for a quick sanity check.
Although the header was valid, there was no data in the message sent to ARTIK Cloud yet, so you should see a "missing sdid" error message in the debug pane.
Pick Device Data
For our initial test scenario, let's assume that the ARTIK module sees that the inside temperature has gotten a little warm, and that the window blinds are open. Therefore, ARTIK commands the blinds to be closed. To record this event, here's the data set the ARTIK module might want to send:
{"insTemp":24.2, "blndOpen":true, "openBlndCtl":false}
Send by Web REST API Protocols
It's a quick process to add the data message to Node-RED and send it.
-
Modify your Function node by adding a payload, where you've inserted your own Device ID in the
sdidfield.1 2 3 4 5
msg.payload = {"data": {"insTemp":24.2, "blndOpen":true, "openBlndCtl":false}, "sdid": "_your_DEVICE_ID_goes_here_", "type": "message" } -
Click Deploy, then trigger the Inject node.
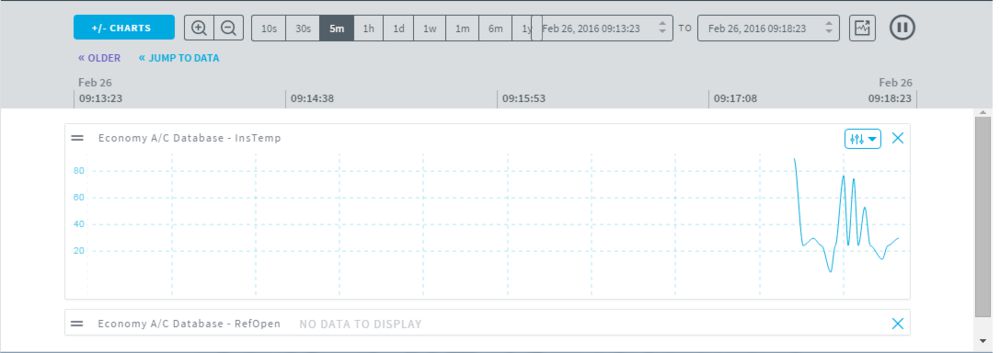
You have just sent ARTIK Cloud a message. Look at My ARTIK Cloud – your data has arrived. Now, for demonstration purposes, let's make it more interesting.
-
Between the headers and payload sections, add:
1 2
var timestamp = String(msg.payload); var lasttwo = timestamp.substr(timestamp.length - 2);
-
Change the payload value of
insTempfrom24.2tolasttwoto use the last two digits oftimestampasinsTemp. You'll get a new value every re-trigger. -
Click Deploy, then trigger the Inject node.
-
Re-trigger, and watch how My ARTIK Cloud tracks the changing data.
You would replace lasttwo with the temperature variable from your locally wired or wireless thermostat in an actual application.
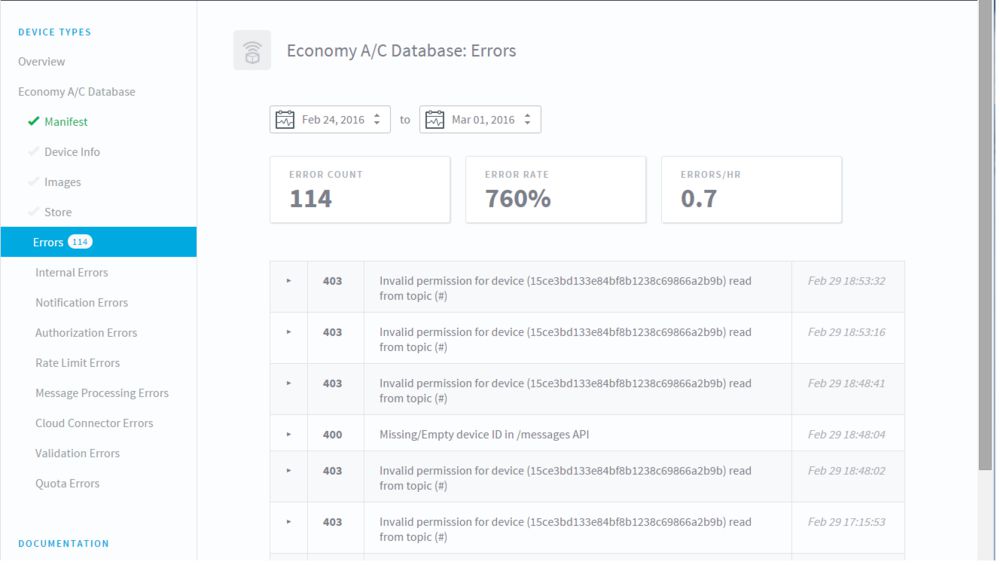
Troubleshooting Tip. No data? The message may not have the correct format, so ARTIK Cloud could not interpret it using the manifest. Look at the error log on the Developer Dashboard under Device Types (as shown below) for hints. Also check variable spelling and capitalization, and use an online .JSON validator (even though it may not catch all error cases).
For reference, your completed Function node Web code should look like this.
1 2 3 4 5 6 7 8 9 10 11 12 13 14 15 16 | msg.headers = { "Content-Type": "application/json", "Authorization": "Bearer _your_DEVICE_TOKEN_goes_here_" } var timestamp = String(msg.payload); var lasttwo = timestamp.substr(timestamp.length - 2); msg.payload = {"data": {"insTemp":lasttwo, "blndOpen":true, "openBlndCtl":false}, "sdid": "_your_DEVICE_ID_goes_here_", "type": "message" } return msg; |
Send by MQTT Protocols
The MQTT method is simpler, but different. Using Web methods, authentication took place over HTTPS by securing an SSL/TLS connection using Device ID and Token data in the Web headers. For MQTT, we need to specify that data in the MQTT output node itself.
-
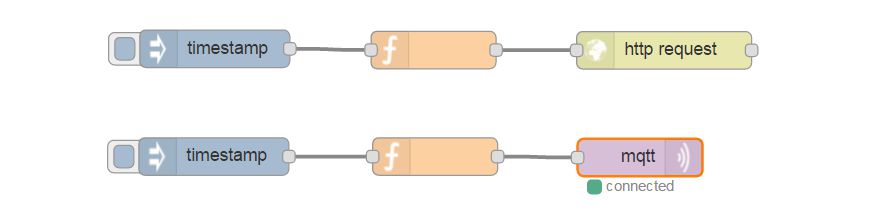
Copy the Inject and Function nodes, and paste them below the current flow.
-
Add an MQTT output node.
-
Connect them all up. Your canvas should now look similar to this.
-
Double-click the MQTT node to set it up, and click on the pencil symbol to edit.
- Under Connection, set the Server as
api.artik.cloudon port8883(the ARTIK Cloud MQTT broker address). - Under Security, set Username to Device ID (
sdid) and Password to Device Token (accessToken); also check 'Enable secure (SSL/TLS) connection' and 'Verify server certificate'. - Click 'Update'.
- Under Connection, set the Server as
- Double-click the copied Function node to slim it down.
-
Delete
msg.headers– you don't need them! MQTT is a "lightweight" protocol. -
Add a 'topic' as shown with your Device ID (
sdid) inserted.1
msg.topic = "/v1.1/messages/_your_DEVICE_ID_goes_here_"
-
Delete everything in your
msg.payloadexcept for the data set itself (don't forget to remove the trailing comma, the word"data":, and its curly braces).1 2 3
msg.payload = { "insTemp":lasttwo, "blndOpen":true, "openBlndCtl":false }
-
- Click Deploy, then trigger the Inject node.
You have just sent ARTIK Cloud a message. Look at My ARTIK Cloud – your data has arrived. You can click on either of the Inject nodes now; the flows give identical results regardless of whether you choose Web or MQTT protocols.
For reference, your completed Function node MQTT code should look like this.
1 2 3 4 5 6 7 8 9 | msg.topic = "/v1.1/messages/_your_DEVICE_ID_goes_here_" var timestamp = String(msg.payload); var lasttwo = timestamp.substr(timestamp.length - 2); msg.payload = { "insTemp":lasttwo, "blndOpen":true, "openBlndCtl":false } return msg; |
Summary
There are several ways to send messages from the ARTIK module to ARTIK Cloud, and all are nearly effortless. Here we've focused on the Web REST API and MQTT protocols. You may end up choosing MQTT protocols simply because they require lower bandwidth.
In our next installment, we will use the Arduino IDE to develop Web and MQTT client applications that do not depend on Node-RED, and will connect edge devices to acquire real data to send to ARTIK Cloud.